
Precautions Before Installation:

1. When the tool is not in use, or for maintenance, change the fixture, blade, be sure to unplug the power first.
2. Prevent accidental turn on. Before inserting the plug into the power outlet, make sure that the switch of the tool is off.
3. Stay awake when working and pay attention to the work. Do not use the tool when you are tired.
4. Check for damaged parts. Before using the tool, carefully check if there is any damage to the guard or other parts of the tool. Check that all movable parts are in the correct position and that the parts that must be fixed are fixed tightly, etc. Check all parts that may affect normal operation.
5. Avoid electric shock. When working, your body must not touch the grounded conductive body, such as iron pipe, radiator, freezer, etc.
6. Before installing the battery, make sure the switch is turned off and the positive-reverse switch is in the middle position to prevent accidental start-up of the tool. If you press your finger on the start/stop switch when carrying the power tool, or if you do not turn off the power tool when installing the battery, it may cause an accident at work.
Grass Trimmer Instruction Manual
Step 1. Install the Main Handle
- Connect the upper handle to the aluminum shaft.
- Tighten the locking knob securely.
- Adjust the handle position for a comfortable grip.
Step 2. Choose & Install Your Blade
🌱 Plastic Blade
Best For
- Soft grass
- Lawn edging
- Regular yard maintenance
Installation
- Place the plastic blade onto the blade holder.
- Align the center hole.
- Insert the fixing bolt.
- Tighten securely with the included wrench.
🍃 Stainless Steel Blade
Best For
- Thick weeds
- Tall grass
- Small shrubs
Installation
- Position the steel blade on the spindle.
- Align the mounting hole.
- Install the washer and locking nut.
- Tighten firmly using the supplied wrench.
🌳 Circular Saw Blade
Best For
- Dense brush
- Thick stems
- Small branches
Installation
- Place the circular saw blade onto the spindle.
- Make sure the blade rotates in the correct direction.
- Install the washer and locking nut.
- Tighten completely before use.
Safety Tip: Always remove the battery before changing blades and wear protective gloves during installation.
View Product: 16PCS Replacement Blades for 3 in 1 Grass Trimmer →
Step 3. Attach the Safety Guard
- Align the guard with the mounting holes.
- Secure it using the supplied screws.
- Make sure the guard does not touch the blade.
Step 4. Install the Wheels
- Slide the wheel bracket onto the lower shaft.
- Lock it into position.
- Adjust the wheel height if needed for mowing or edging.
Step 5. Insert the Battery
- Slide the battery into the battery slot.
- Push until you hear a click.
- Press the release button when removing the battery.
View Product: Universal Rechargeable Lithium Battery →
Step 6. Adjust the Height
- Unlock the adjustment latch.
- Extend or shorten the shaft.
- Lock it again at your preferred working height (35–47 in).
Step 7. Adjust the Cutting Head
- Press the angle adjustment button.
- Rotate the head to the desired angle.
- Release the button until it locks into place.
Step 8. Start Trimming
- Press the safety lock.
- Squeeze the trigger.
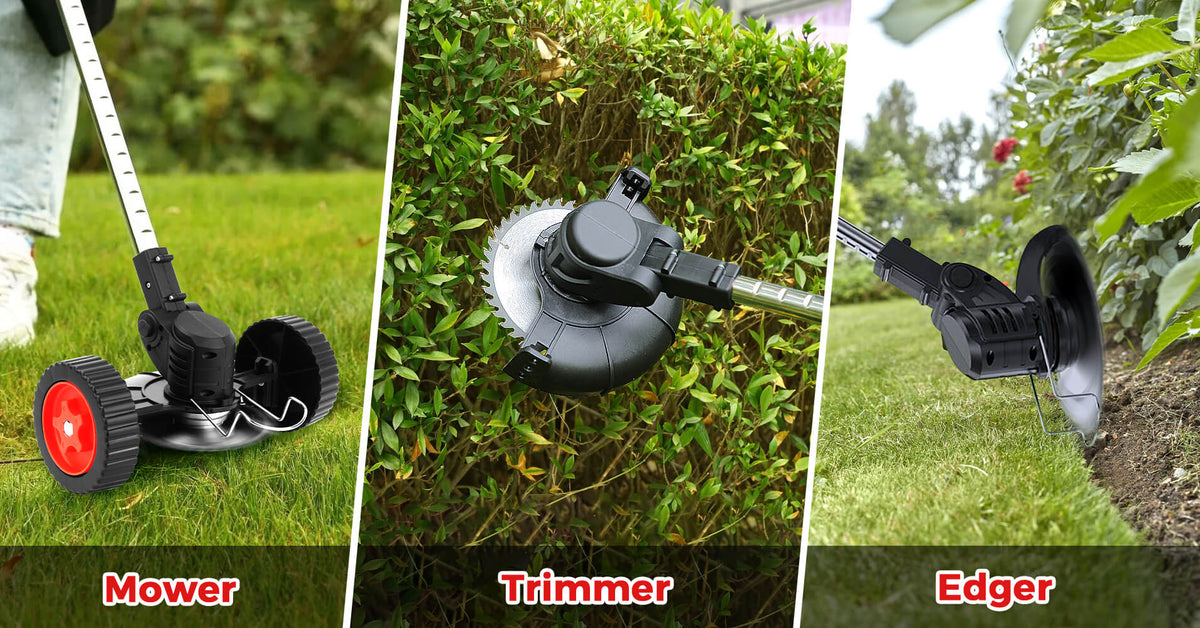
- Begin trimming, edging, or mowing with smooth, even movements.
🌿 Enjoy effortless lawn care with your iToolMax 3-in-1 Cordless Weed Cutter!
Installation Steps

Please view the instruction video in this link or scan the QR Code.

Most users read:
- 3 Best Cordless Tillers for Your Small Garden 2026: Top Picks & Buying Guide
- 3 Best Cordless Weed Eater for Small & Medium Garden

FAQ About How To Use 3-In-1 Cordless Grass Trimmer
What Does A Grass Trimmer Do?
iToolMax Weed Eater is specially designed for clearing weeds, trimming lawns, and cutting shrubs with ease. It can clear weeds across up to 1 acre in just 15 minutes, delivering up to 10X faster trimming to keep your backyard, garden, and lawn neat and well maintained.
Are the adjustable heights to the head/blade when the wheels are attached for cutting grass?
No, while mowing, the height of the cutting head/blades on a 3-in-1 mower cannot be adjusted; this is a safety feature.
If you want to adjust the cutting head and blades, we recommend that you stop mowing and remove the battery before doing so.
Share:
4 in 1 Cordless Weed Eater Pro Instructions
10 Essential Gardening Tools for a Thriving Garden in 2026